19. May, 2020

Resource and Waste management on pack symbols

On package labels and symbols are designed to provide information on the source and disposal of the packaging that  is quickly and easily understood. In most cases this objective is achieved without further explanation,  but this is not always the case. There is considerable confusion over the meaning of the Green Dot  which does not mean that the packaging is recycled or recyclable but that the producer has contributed (financial?) to the recovery and recycling of packaging.

Degradable and biodegradable also cause some confusion Degradable means the entire product or package will completely break down and return to nature within a  “reasonably short period of time after customary disposal. The American Society for Testing and Materials (ASTM) defines biodegradables as: Anything that undergoes degradation resulting from the action of naturally occurring microorganisms such as bacteria, fungi, and algae  within a reasonably short period of time after customary disposal”, as indicated by reliable scientific evidence.

The “reasonably short period of time” for complete decomposition of solid waste products varies the US FTC suggest  one year while in the UK the test period is six months. Items destined for landfill, incinerator, or recycling facilities will not degrade within a year, so unqualified biodegradable claims for them should not be made. These terms can be potentially confusing to the public both in terms of where to dispose of the material  and what happens to it once discarded.

Compostable symbols also cause some confusion. The seedling and compostable designates that the package is suitable for only in an  industrial system. Where material can be home composted will have the term “home composting” on the pack.   Carry on Composting have prepared two free Power Point presentations covering over 40 on pack symbols that can be downloaded and used for training  and increasing awareness of the symbols they can be downloaded at http://www.carryoncomposting.com/416920209 or by using this link Compostable Bags 

15. May, 2020

Community Composting in Lockdown

Now that the lockdown has be lifted enough to allow travelling to the Compost Demonstration site to maintain the bins, we have the  challenge to clearing at least one of the Reception bins quickly to make room for fresh material from the allotments. During the past few weeks local  allotment plot holders have been able to work their plots as part of their exercise regime and as a consequence both reception bins have been filled.

Just before lockdown it was noticed that as result of the spring weeding prior to sowing and planting we were getting a high percentage of weeds for composting and unusually the soil had not been knocked off  the roots.  Luckily over the three of four weeks in the reception bins few had started to grow which will mean that we will be adding more soil to our bins than usual., as there will not be time to knock the soil from the plants when adding them to the bins. The lockdown also meant the main community pallet bins containing the compost made last year have not been emptied so the “household” bins on display will be used initial

Yesterday I started with two of our wooden bins a Lacewing    and Rowlingson Beehive kindly donated by GardenSite  https://www.gardensite.co.uk/garden-structures/composters/. Both are bins suited for use in a modern small garden. The Lacewing easy load composter is slated bin has an easy access as all the front slats can be removed.

 The beehive bin makes an attractive feature in a smaller garden  and is easy to fill with a hinged lid and a prop to keep it open when material is being added. Harvesting is by means of a hatch at the base of the bin.

 The material added to the bins on this occasion, as well as including the soil on the roots the  mentioned above, consisted of a mixture of annual and perennial spring growing weeds as the mix in the reception bin made it impractical to separate them. While the official advice is not to add any roots from perennial plants many allotment gardeners just put everything in the bins  usually with out significant problems. Any  perennial weeds that  survive the composting can be removed at the end of the process. Progress will be monitored in future blogs. More information on the site and training available  can be found at  http://www.carryoncomposting.com/142941482 and  http://www.carryoncomposting.com/443725783

8. May, 2020

Composting video from Garden Organic

Garden Organic have produced  new online content to engage with as many people as possible during Compost Awareness Week and while  Staff and Master Composters are unable to go out into the  community due to restricts during lockdown. as we would normally be doing and we are excited to send this out to you all today.

 'Composting: An online lesson for kids'. Initially created for upper primary school children this video is now open up to everyone by uploading the video to our YouTube channel and including a link to the quiz in the video description. This means hundreds of children could be using this resource every day of Compost Awareness Week... and beyond!

 'Get Composting with Garden Organic'. This is a shorter version of the above without the little animated character and the more light-hearted elements that were added to keep the younger audience engaged. The video and the description explains how people can contact the UK Garden Organic network (volunteers and trainers) to get more detailed composting support, so it is very much a taster, but should be enough to get people started.

 You can find both videos on the Garden Organic YouTube channel, link below:

https://www.youtube.com/user/GardenOrganic

More details of the master Composter scheme are available at http://www.carryoncomposting.com/142941473 or follow this link Master Composters

 Please follow, like and share @GardenOrganicUK on social media.

More computer based material on this site can be found by following this link 7. Compost Games

7. May, 2020

Dealing with Horsetail (Mares Tail)

It is spring and as usual the thoughts of unlucky gardeners will turn to Horsetail (Equisetum arvense)  also known as mares tail found on allotments,  gardens and on waste ground and non-cropped areas. It has a thick, silica-rich outer layer and small needle-like leaves. And will now be appearing across the UK as light brown stems, 20-50cm (10-20in) before developing into  60cm (2ft) tall fir tree-like plants.

 There is another variety of Marestail (Hippuris vulgaris) which  is an aquatic weed found in ponds or slow-flowing streams. This advice applies to the variety found on allotments and gardens.

Horsetail can be a nuisance as it is difficult to eradicate and while repeated cutting will weaken the rhizomes it  is usually  ineffective as a mean of killing the deep-rooted plant. Control  by digging can make the problem worse because each broken root fragment can develop into a new plant by itself. However, digging and carefully removing rhizomes can eventually be effective. Regularly removing the shoots and rhizomes as soon as they appear will weaken the plants, but total eradication requires determination over several years.

An alternative method of eradication involves adding dolomite lime to the soil around the horsetail to raise the soil pH.  The lime is  worked  into the soil and watered  thoroughly. Fertiliser is applied after two weeks. The process is repeated annually until the horsetail weeds are eradicated This can take up to five years

It can be controlled by successive applications  of an appropriate   weed killer such as Kurtail Evo.  

On the more positive side.  The  weed can be turned to good use by drowning and using the liquid as plant feed and the sludge as a booster to the compost bin.   Drowning  the plants to make horsetail tea liquid feed as part of the eradication programme  can either be in a lidded bucket or a water butt depending on the quantity. (My photos tend to be bucket based as we want to demonstrate the process rather than just eradicate the weed).  Horsetail is high in silica and a when soaked to make a tea which, is said, to coat the leaves of treated plants producing a fungicide and protect against blackspot, mildew, and mint rust. 
 Allotment site Committees, or groups in affected areas of allotments,  might organise plot holders to spend a day on an allotment wide horsetail harvest and drowning.

The plants need to be fully submerged under the water so  are best put in a sack or an old vegetable net  pinned down with a large stone or suspended in a submerged weighted bag.  Regular stirring is recommended. The fermentation process can range from  10 days to 3 weeks, depending on the ambient temperature. During fermentation, the mixture will produce gas which will  bubble on the surface. Once the bubbling has stopped it has finished bubbling the liquid can be strained and used.

Usually when I write about the  eradication of this weed  some readers will stress that it can be grown as a medical or cosmetic herb which is fine in a private garden but  it should be remembered that the next occupant of an allotment plot, and possibly those cultivating adjacent plots,  will inherited a problem of a very persistent weed. I advocate banning the deliberate cultivation of Horsetail  on allotments.

Source further information

https://www.progreen.co.uk/content/kill-horsetail-marestail/

 https://homeguides.sfgate.com/kill-horsetail-45689.html.

https://carrottopsallotment.com/2017/04/28/how-to-combat-horsetail-weeds/?blogsub=confirming#blog_subscription-3

3. May, 2020

Aerating Compost

Aeration

 Aeration is necessary to provide the composting microbes and larger creatures  with the oxygen necessary to convert the  organic matter into compost  and to achieve the  temperatures necessary for the more  rapid decomposition of hot aerobic composting.

If the material is not aerated  composting will still happen but will take longer, a year or 18 months in some cases, and may become anaerobic.  Aeration by turning the composting material will involve extra work but I believe it is worth it.

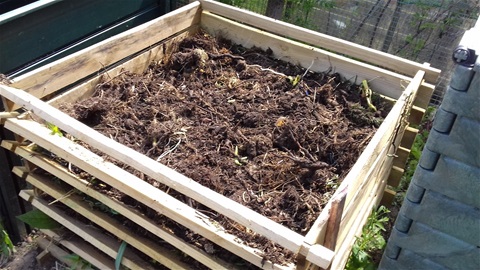
If using pallet or New Zealand bins without a front, or where the front panels can be easily removed, the material can  be turned from one bin to the next using a garden fork. However, there are other techniques and bins  which avoid the need to turn the contents and as some of these are applicable to the entry level Dalek bin. 

1.  Building air into the  bin

  • Aeration at the base

Mount the bin or pile on  an old pallet, this will need replacing as it rots but is easily checked when the bin is emptied, or build a base out of good quality wood about 3-6 inches off the ground to allow access of air into the base. The slats need to be spaced to allow entry of air but sufficiently close together to prevent the entry of rats and other vermin. 

  • Aeration via the base layer

Start the composting by creating a base layer of twigs or small branches from pruning shrubs, brassica stalks etc  as a base level to allow air to flow up into the compost. This base layer  will not rot down as quickly as the rest of the material and may make it difficult to empty the bin using the hatch but if this is a problem a Dalek type composter can be knocked over or lifted of the compost when harvesting.

  • Aeration with sticks

Some add more twigs and scatter them throughout the pile to assist in aeration but this approach is only  applicable if the contents are not to be turned  as the sticks make it difficult to makes it more difficult to turn the pile using a fork.  Another source suggests that if building a heap or pile, rather than filling a bin,  long sticks could be laid horizontally to crisscross the heap at different levels with hand holds protruding from the pile.  As the heap matures the ends of the  of the sticks can be turned, lifted and shaken to help aerate the pile .

  • Aeration  by browns and bulking agent

At home with a small garden and a steady supply of food waste (nitrogen rich greens) you may opt for a system whereby a kitchen caddy of material is added to the bin every few days with cardboard or shredded computer paper as the main source of browns. If this is the case air spaces  can be built into the heap by adding egg boxes, the cardboard tubes from  toilet and kitchen newspaper   and crumpled corrugated cardboard. The addition of a bulking agent.  such as woodchip. absorbs water from the food waste and helps maintain the air spaces.

 Hotbin advise that in their bin the correct use of a buking agent, such as partially composted woodchip, will provide and maintain  sufficient air spaces for the bin to work effectively. This passive aeration occurs  where rising hot air pulls cold air into the  heap.

2.    Aeration systems

Some of the more expensive bins, such as the Aerobin 400,  have a central aeration system which is said to do away with the need to turn the compost. Home composters can create their own aeration tube by   drilling holes in plastic downpipe and placing this in the centre of the bin as soon sufficient  material has been added to keep it vertical added. 

3.    No-turn pallet bin

It is possible  to make  compost in a traditional bin using a good combination of green and brown layers without turning and still reach a temperature approaching 80°C.  Shewell-Cooper described one such a system in 1972 and more details are given at http://www.carryoncomposting.com/443725799

4.    Turning the contents

  • Hot Composting

In order  to create finished compost in a short time and to kill seeds  and perennial weeds hot composting is required with  the contents of the bin being turned regularly during the initial  stages.   This can be at fixed times or every time the bin temperature drops below 40°C (or about 100° F)

Hand turning using a garden fork (bin) or pitchfork (heap)  can be used to  home compost in a heap,  New Zealand box or pallet bin particularly if the material is being transferred to an empty adjacent bin. It is easiest to move the material from one bin to another.

  • Windrows
  •  In a large garden  windrows may be used to compost. Shredded mixed garden waste, such as grass cuttings, pruning and leaves.  The windrows are turned on a regular basis to aerate the  content with the outer layers binge moved to form the core of the new windrow  with the material from the centre of the established windrow being placed round it.
  • Cool Composting

If using the slower  cool compost approach adding a mixture of brown and green materials to the bin weekly as they become available requires less effort but may not kill weeds. Under this type of composting the organic material at the bottom of the bin is ready for use after about a year while the top layers always consist of relative fresh waste. The material is often not turned, and harvesting is through a  hatch at the bottom of the bin. Some  composters, usually those with several bins, do turn the  do aerate  the material by lifting the bin off the compost and refilling it.  
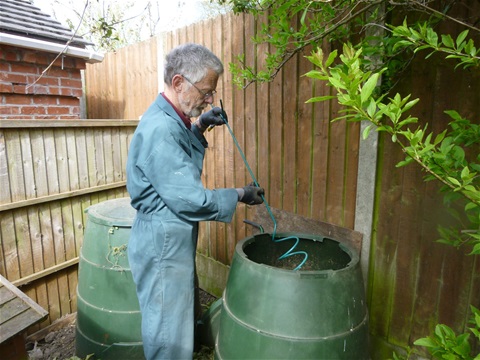
Alternatively, a compost aerator tool can be used. This usually  consist of a metal rod handle with some hinged metal arms with  teeth on the end. This is plunged into the compost and   the teeth will open out as it is pulled out and create air  pockets inside the compost. A second type have a large corkscrew on the end which is turned into the compost. There are photos on the above webpage  

  • Compost Tumblers

 If using a compost tumbler, the material is turned and aerated by turning the whole drum  it also helps to control the moisture content of the material  to prevent the compaction that may occur in wet material. The effectiveness of this type of compost bin at aerating the material varies with the shape of the bin, the shape of any internal bars to break up lumps, the moisture content and  the weight of the bin when filled to working capacity. 

Further information can be found at http://www.carryoncomposting.com/443725799