Composting : Getting Started

2 small kitchen caddies.
White caddy has a carbon filter the green does not.
Follow Carry on Composting on Facebook https://www.facebook.com/pages/Carry-on-Composting
Composting was once the preserve of farmers and gardeners but with the increasing interest in the environment, sustainability and climate change it is now being actively promoted by local Councils and environmental concerned households in order to reduce the waste sent to landfill and greenhouse gases released into the atmosphere.
The recycling of glass, paper and newspapers has become common in many households and it is now routinely undertaken for metal cans, plastic, and in many areas, green waste from the garden and food waste is undertaken by councils either free of charge or for a fee. Councils are increasingly charging for green waste collections to help balancing the books at a time of expenditure cuts even though this may appear to conflict with the need to protect the environment.
Organic materials make up about 60% of household waste. Garden waste e.g. grass clippings, old vegetables, leaves, hedge trimmings along with uncooked kitchen waste such as vegetable peelings and outer leaves are now frequently composted at home as well as being collected at the kerbside . The usual advice is that cooked food waste should not be composted as it would attract rats or smell. However, with the correct techniques and bins such materials can be composted without problems and one of my ambitions is that more cooked food waste from households, school and businesses be composted on-site.
While collecting organic waste and including it in a municipal composting system saves it being sent to landfill, incineration or anaerobic digestion composting on-site, be it at home, allotment, school or a small business, saves the energy that would be required to collect and transport it to a central site. In addition to saving space in landfill it can also reduce air and water pollution. Local composting either by individuals or community groups also means that control and the product remains with the individual or community rather than one of the large corporations.
In this section we will consider how to get started and the collection and separation of the waste into waste streams depending on the composting method required.
The initial separation depends on the source i.e. garden or household waste. Most garden waste is generated and composted within proximity to the source so we may not need a separate storage area for compost waste as it may be put straight into the compost bin. However, some batch composting techniques may require the compostable material to be saved in separate browns and greens piles until there is enough compostable waste to fill the bin all in one go.
Garden Waste
Garden waste includes grass cuttings, trimmed leaves from vegetables, annual weeds (without seeds), grass clippings tree leaves, twigs and sticks, and old pot and vegetable plants. It can also include items specifically grown to compost such as comfrey. It is even possible to compost quite large logs, stumps, and other woody items.
Normal garden and uncooked kitchen waste may be composted using a compost heap or bin and in theory one of easiest ways to compost garden waste is make a “cold” compost heap at the bottom of the garden where garden waste can be piled up and allowed to decompose over the winter. Kitchen scraps can be buried in the pile so that they can also rot, away from the attention of rats and other vermin. The problem with this is that the heap tends to spread, attract vermin and look a mess. My appeal to you is to read on before starting a heap.
Most of us now use cold (or passive) composting techniques in a plastic bin. This consists of added waste to the bin in relatively small quantities to the bin as they become available. The material will not heat up significantly for any length of time. Cold composting does not destroy pathogens which means that diseases on plants, that can survive away from the plant, will survive the composting process. The other approach to composting is “hot composting” where the bin is filled in one of two batches from stockpiled waste. This produces compost in a much shorter time. It has the benefits of killing weed seeds and pathogens (diseases). See Compost Temperature
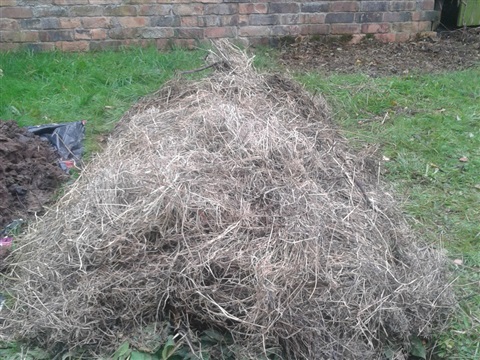
In some cases, items that present problems to the home composter such as perennial weeds, hedge cuttings etc may be collected by the Council as part of their kerbside collections or may be accepted if taken to the local recycling collection point. However, in many cases there is also a home option e.g. many perennial weeds ( go to Perennial Weeds) can be drowned in a bucket of water or dried on a rack or bag in the garden and then composted.(See Plant Liquid Feeds). Special techniques have been developed to deal with other waste e.g. grass-boarding for larger amounts of grass or a Hügelkultur mound to deal with logs.
When considering the composting of garden waste, we normally think of composting at home but this aspect of composting could include Community Composting on an allotment, blocks of flats/apartments, school or housing development or even at a central village location.
Kitchen Waste
Collection of kitchen waste will require a degree of separation depending on the types of waste and the composting techniques to be used.
- “Conventional” Compost bins, used for cold composting or passive composting, such as the plastic bins provided under local Council schemes and wide range of bins available for purchase on the internet including wooden bins Wooden Compost bins of different types of conventional plastic bin Plastic Compost, tumbler bins which are turned to aerate the contents Tumbler Composters and even metal bins Metal Compost Bins . Most of these bins are used for cold composting and do not produce enough heat to kill germs in addition they often lack a base which allows access to rats and other vermin as well as beneficial composting organisms. – Uncooked vegetable waste e.g. peelings. Organic materials are normally added in small quantities to this type of bin as they and when become available. The composting process will normally take about a year. The exception to this are tumbler bins which are usually used for batch composting where the organic materials are saved and then added to the bin in a batch.
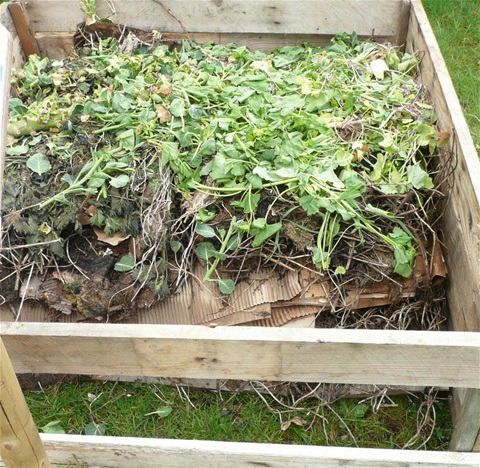
- Larger plastic or wooden bins (including homemade and "pallet" bins) used for hot composting where the material is usually added in separate layers and turned regularly for at least the first three weeks or a month (Wooden Compost bins)
- Sealed vessel Hot Composter such as the Hotbin or Jorra for cooked food waste ( Composting Food) in addition to other waste.
- Wormery Used to compost uncooked kitchen
waste excluding citrus and onions.( Wormeries)
- Bokashi system an indoor system used to cooked food waste (Bokashi bins)
To avoid smells in the kitchen and too frequent trips down the garden to the compost bin it is advisable to have a kitchen caddy that can be kept indoors. A separate caddy will be required for each waste stream although I just use two caddies (compost and worms) in addition to taking cooked food waste directly to the relevant cooked food composting bin in a plastic “take away” container which can be washed immediately.
There are a wide range of kitchen caddies available in plastic, pottery, or metal. I prefer the plastic as they can be easily cleaned by putting in the dishwasher. Some are quite large, but I would suggest the use of a bin that is filled in a couple of days to avoid unpleasant smells. I also put newspaper in the bottom of the caddy to absorb some of the moisture in the food making it easier to tip the waste in the bin.
Some kitchen caddies include a charcoal filter to reduce the smell. If you are considering one of this type, ensure that it can be easily removed when washing the caddy. Others have holes in the sides help with ventilation and reduce potential smells, but these need the use of a compostable paper or plastic bag. (There is more information on kitchen caddies and the use of compostable bags as a liner to keep the caddy clean at Compostable Bags ). It is not necessary to use a commercially available caddy any recycled container of bucket can be used. Preferable with a lid to contain the smells.
The local Council may operate a food waste collection scheme where they provide caddies for use in your kitchen that are emptied into a larger container kept outside and collected as part of the kerbside collection. Unless you treat the bin as a mini-compost heap and balance the greens and browns added it is likely to smell if collected on a weekly or fortnightly basis.
Other Household waste
Most of the items mentioned above are what are known in composting terms as Greens but to have an effective working bin we need a balance between Greens and Browns. Luckily, we have good sources of browns at home. These include cardboard, paper including shredded computer paper, egg boxes the tubes from toilet and kitchen and the bedding from vegetarian pets e.g. chicken and rabbits. Composting is a good final stage in a home identity theft and security programme as it is difficult to get personal information from composted shredded paper.
For a list of items that can be composted click on the link What Can I compost?
Composting at home
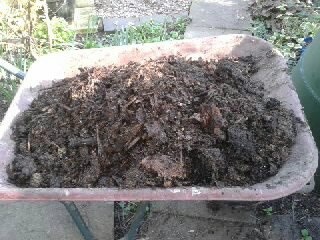
Compost from an allotment compost bin made from pallets
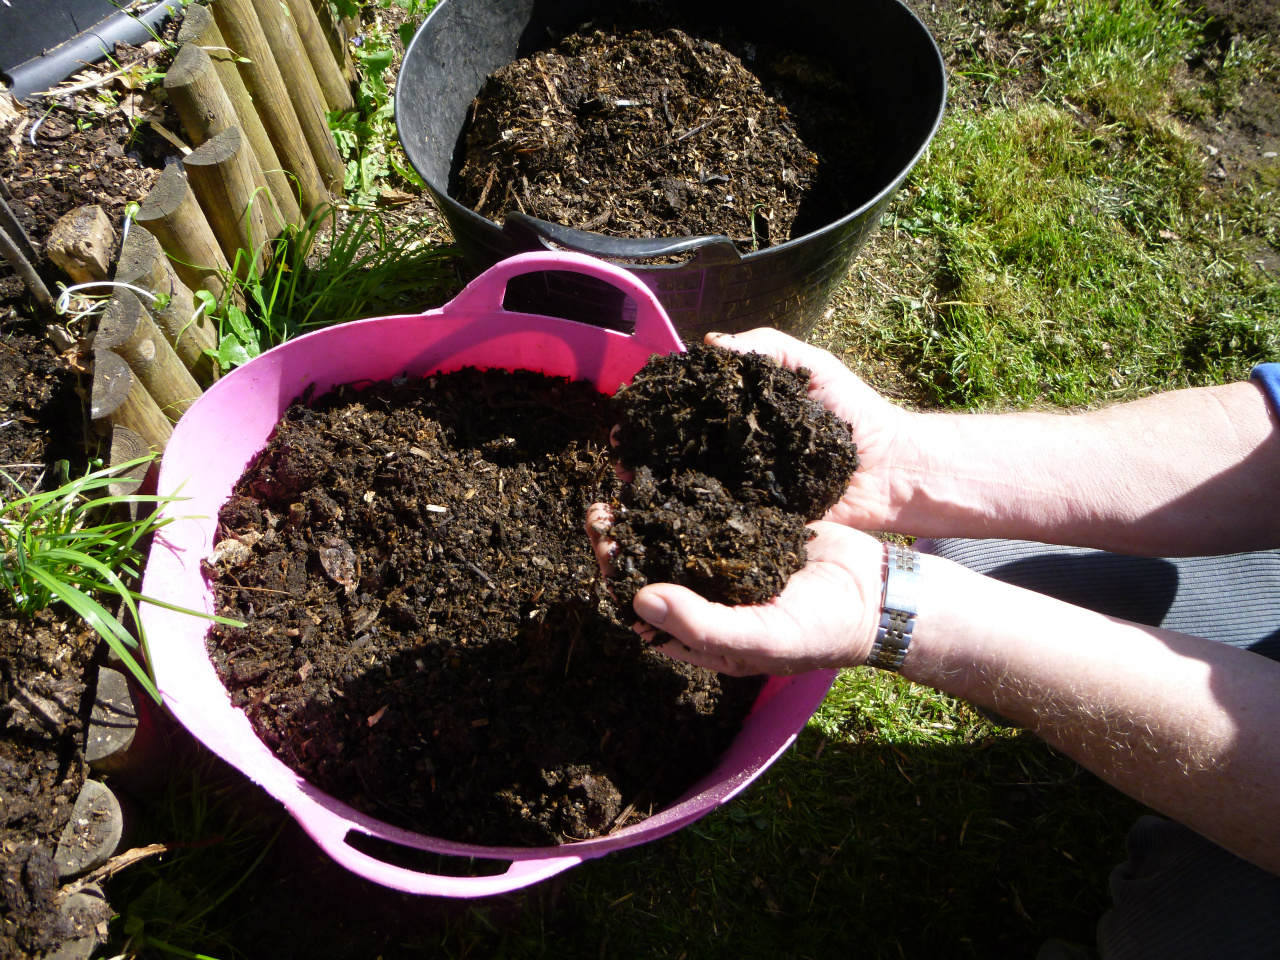
Home composting is a natural process that can convert garden and most kitchen waste into a material that can be used as a soil improver, garden mulch, or to top up flower and patio pots. It has the additional advantage of diverting waste from landfill and the cost of collection by the local authority. It is safe to assume that if you are reading this page you either already compost or are interested in composting.
If you are reading these pages I assume that you are interested in composting and probably already compost at home, allotment or school. If this is the case it may come as a surprise to you that almost half the food waste sent to landfill from households that already compost could have been "home" composted. Most of us can compost more.
Anything that was once living will compost, but some items, such as cooked food or faeces from carnivores, are best avoided in conventional heaps or bins to reduce the risk of attracting attracting rats or spreading disease. There are special techniques that can be used to deal with these materials which are addressed in other parts of this site. If you are interested in composting please consider composting your cooked food. Adding it to a special composter daily must be better than storing it in a caddy for a week to be collected by the council.
Landfill is expensive, and organic waste breaks down in landfill to produce methane and greenhouse gas. Composted correctly at home the waste decomposes aerobically without producing methane and provides us with a free soil improver in the form of compost plus liquid feeds, e.g. worm wee or compost tea, if we wish to produce them.
Compost can be made simply by adding compostable items to a compost heap or trench. It will compost eventually. Grass mowings and soft young weeds, high in nitrogen, rot quickly working as 'activators', getting the composting started, but without the addition of carbon rich materials such as cardboard or woody items, may produce an unpleasant wet and smelly end product. Details of how to avoid this are given later.
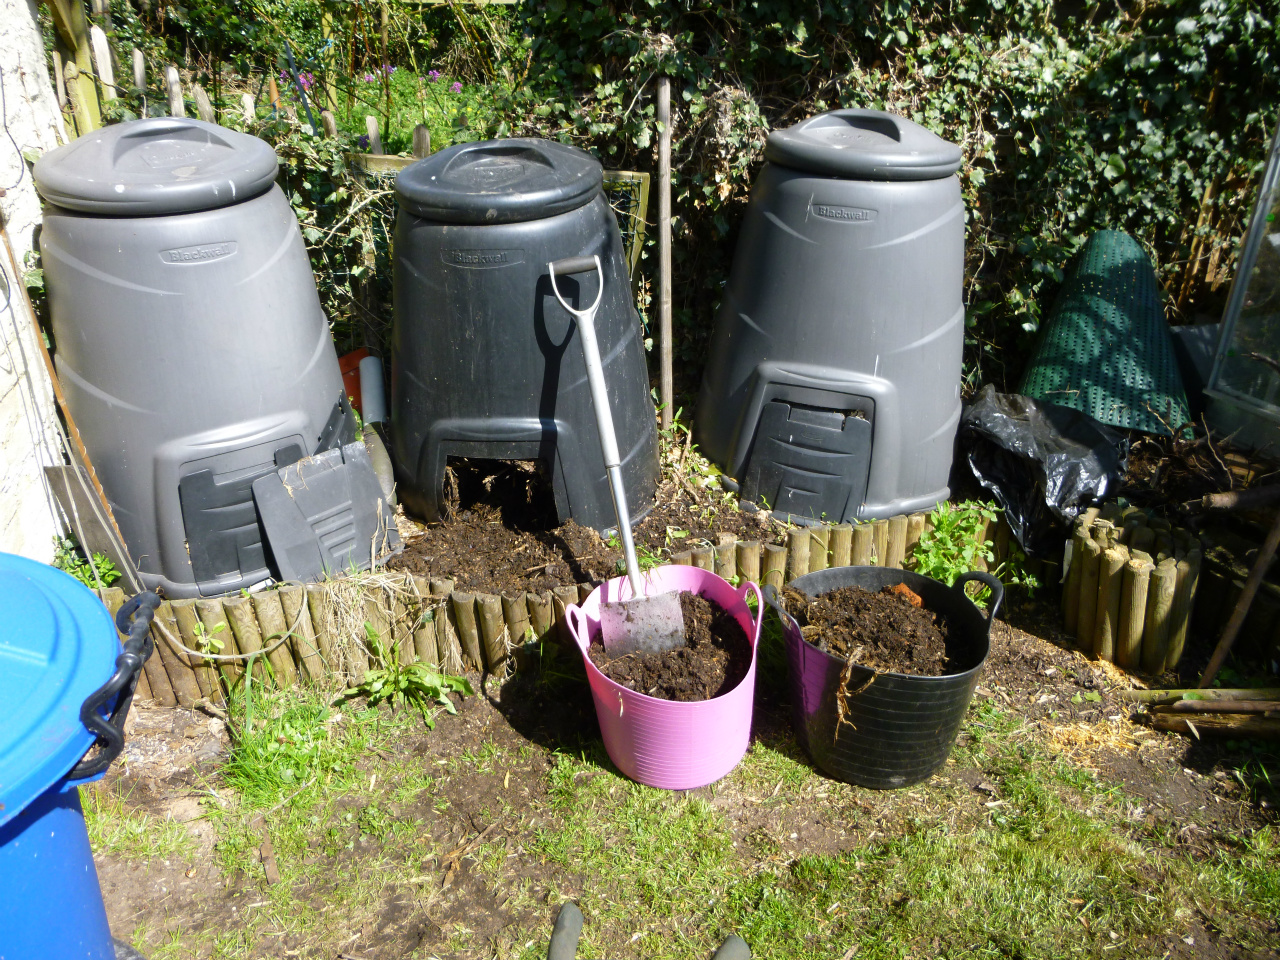
Today when composting is mentioned most people will think of the plastic compost bin available at a subsidised price from the local council. However there are a wide range of alternative plastic bins of varying complexity and costs as well as wooden, metal bins and a number of more traditional methods of composting.
Composting Area and choice of method
The choice of composting method will depend on the type, and quantity, of materials that you want to compost. While the original intention might have been to just have a cheap compost bin purchased under the local council scheme you can, once bitten by the composting bug, soon find that you have your own Composting Centre trying to take over the garden as you discover a desire to compost additional materials and try different bins.
In this section we will consider select suitable techniques for different materials
Garden Waste
| 1 | Vegetable plants, annual weeds, some grass | Cool or Hot compost heap or bin, sheet or trench composting |
| 2 | Perennial weeds | Drown, Perennial weed heap or bag |
| 3 | Autumn Leaves | Compost (shredded), Leaf mould bin or bag, or use as part of a mulch |
| 4 | Grass | Grass boarding or mulching |
| 5 | Wood (logs) | Hugglekulture mound or woodpile |
| 6 | Hedge cuttings, small branches | Shred and compost bin |
Kitchen Waste
| Uncooked vegetables (including onion, citrus) egg shells | Compost as in 1. Above or Bokashi bins |
| Uncooked vegetables excluding onions & citrus | Compost bin, Wormery Trench, pit or sheet composting |
| Cooked food, including left-overs, meat and fish | Food Composters or digester Cooked food can be composted in a wormery but is best buried under other material and may smell. Cooked food can be pre-treated for 2 weeks in a Bokashi bin before being added to a wormery |
Household Waste
| Cardboard, paper | Compost systems (including sheet compost systems) wormery |
| Contents of Vacuum cleaner, hair including dog hair | Compost |
So there we have it. The idea might have been to have a single compost bin to help save the planet and now we have a Domestic Waste Recycling Centre at the bottom of the garden! Depending on your waste and enthusiasm this will include:
- Compost bins and or heaps.
- Cooked food composter
- A wormery (or two if you have dogs)
- A hugelkultur mound for wood and/or a log pile
- A grass boarding area
- Leaf mould bin or bags
- Perennial weed killing area
- Compost trench for runner beans or post hole(small pits) for chop and drop composting around the garden.
Most domestic compost bins will be mounted directly on the soil but when designing the composting area consideration should be given to mounting the bins on concrete slabs.Some bins such as larger tumblers mounted on a frame and some food composting bins are suited to being mounted on a firm level base which is easliy cleaned. Pads also have the advantage s in controlling any leachate from the bins to restrict pollution and this may be a legal requirement with larger composting systems.The composting area should not drain into a dich or water course Pads also provide a good working surface and makes it easy to shovel material when turning the contents and avoids the muddy patch common in fromt of bins that are turned regularly. They also make it easier to clean up after turning and keep the site tidy.
The composting area may creat some odours, if things go wrong or certain plant teas are made, and should not be located where the smell may effect neighbours.
Now that you have a source of compost it would be a pity not to have an area to use the compost to make Compost tea. It would also be helpful have a space to grow comfrey or nettles as a source of greens for the compost bin, and seeing as you are now growing them, it would be a shame not to include a space for a water butt or comfrey tube to to produce Comfrey or Nettle liquid feed to supplement the compost tea. Go to Liquid Feed for more information.
At this stage you might consider moving to a house with a larger garden. We will eventually consider all of these methods on the website.
The advice, often given, is that the compost bin should be kept near the house to avoid frequent trips down the garden path. However if kitchen caddies are used it will not be necessary to visit the bin quite so frequently and it may be located away from the house so that smells and flies will not cause inconvenience if things go wrong. It does need to be accessable from the house (I would suggest by a concrete or slabbed path) and if garden waste is to be composted by a wheelbarrow. In most cases the bin should be placed directly on the ground which should be loosened before being covered by the bin. Fitting a base to the bin will help prevent vermin gaining access to the contents. A concrete standing may recommended for some bins, such as New Zealand bin it will make emptying much easier. A solid base may be recommended for other styles and are certainly advantages when using some of the tumbler bins.
Rodale (The Complete Book of Composting) recommends locating the compost heap in a shady spot rather than direct sunlight. This advice was almost certainly designed for what may now be regarded as large heaps or bins (of at least a metre square). This is also true of the modern plastic bins but the recommended for the Green Johanna is that it positioned in the shade Si ideally the composting area should be in the sun or semi-shade so that the heat from the sun can be used to help raise the temperature in the bin.
The bins should ideally be protected from prevailing winds to prevent them drying out and on a level surface. They composting area should located away from water courses of drains leading to a stream so as to prevent lechate entering the watercourse. Rats tend to follow the lines of fences, hedges and buildings so it might be advisable not to put the bins too closeto these potential rat runs.
The general advice is not to locate a compost bin directly under trees and certainly not under conifers although some say that birch and elder are fine.
Greens and Browns

Balancing Greens and Browns
“Compost happens” (and if you search the net you can buy the tee shirt) but in only happens due to the work of millions of compost creatures from bacteria and fungi to worms. Like all creatures they need food and the right conditions e.g. warmth air and water to and turn the waste organic matter into friable earthy compost. Our compost creatures need a source of nitrogen and carbon.
We divide compostable materials into two main groups Greens and Browns. The Greens, mainly materials that are green in colour, a good source of Nitrogen having a low Carbon: Nitrogen ratio. You may see this in books and leaflets as the C:N ratio. If you are interested in the technical bit Greens have a C:N ratio of less than 30:1 while Browns( mainly brown in nature) being high in carbon have a C:N ratio of more than 30:1. You do not need to remember this to produce good compost! There is more about the C:N ratio and the carbon nitrogen content of different materials on the Compost C: N Ratio
Greens
High in nitrogen, they also tend to contain most moisture. Put simply the Greens provide nutrients and moisture for the compost workforce. Examples of greens from the house are vegetable peelings, lettuce leaves, banana skins and coffee grounds. Greens from the garden include vegetable "tops", grass mowing’s, nettles, comfrey, annual weeds, and old flowers. Greens decompose quickly.
Browns
High in carbon the Browns decompose more slowly and provides the energy for the source for the microbes that carryout the composting process.
Browns also provide the means of absorbing excess moisture that would be produced if greens were composted alone. The browns facilitate airflow within the heap to enable the activity of aerobe organisms within the pile. If it is low in browns and it becomes a compacted mess which air cannot penetrate anaerobic micro-organisms take over and produce a smelly mess often found if too much grass is composted. Examples of browns include cardboard and shredded computer paper from the house and, from the garden, potato, pea, and bean hulms, stems of brassicas and hedge clippings (preferably shredded) and woodchip.
There are various methods for calculating the Green: Brown ratio but for home composting the current advice is to use about equal amounts of Greens and Browns. For gardeners the Browns, e.g. Tough vegetable or flower stems, old bedding plants, shredded or small pieces of hedge clippings and old straw can be considered as a single group containing material that is slow to rot. However, when dealing mainly with garden waste it can be helpful to sub-divided the Greens into two groups so that the quantity of Browns to be added can be adjusted to prevent the Greens becoming wet and smelly. Group one consists of those that rot quickly e.g. grass clippings, comfrey, nettles, young annual weeds and plants, and poultry manure while the second intermediate group which takes a little longer to decompose such as coffee grounds, cut flowers, vegetable leaves and trimmings, rhubarb leaves, soft hedge clippings
Bin Size Matters
We consider different types of compost heaps and bins elsewhere but at this stage it is important to make the point that a heap or bin should be at least 1 cubic yard (3’x3’x3’) so that it retain the heat necessary for the composting process to operate effectively. If the bin of heap is too large, anaerobic zones may occur in the central core or in undisturbed areas which will slow the composting process and create cooler areas as the material ferments. If the bin, heap, or windrows are too small they will not retain sufficient heat to kill pathogens and weed seeds or to evaporate the moisture. In such heaps aeration by turning is more important than in a small cool composting bin.
Composting will still occur in smaller piles; it will just take longer to produce a finished product.
If possible, the bin or pile should be located in a sunny well-drained area while accepting that in very hot weather it may be necessary to add water keep it from drying out. Some bins such as the Green Johanna like shady areas of the garden.
Many people will purchase their first bin through the scheme operated in conjunction with their local Council without thinking of the volume of waste they produce. This is perfectly acceptable, but it is quite interesting to carry out a simple waste audit. If you use a kitchen caddy it is easy to calculate the amount of kitchen waste produced in an average week. If you do not have a caddy use a plastic bucket. Having estimated your wet kitchen waste. It is then easy to calculate the amount of browns required on the basis of either equal amounts of Greens and Browns or 1 part food waste to 2-3 parts Browns (card and paper waste) depending on the materials you are composting. If you have a garden the quantity of garden waste can also be calculated during the growing /harvesting season using the bucket method with one bucket for green and one for browns. From these calculations you can estimate the size of compost bin or heap required. Alternatively, you can be like the rest of us and keep buying/making bins as the compost bug takes hold.
The porosity of the materials will also influence the composting process, air spaces being central to effective aerobic composting. Small particle size, tightly packed materials can lead to the air spaces being filled with water resulting in anaerobic conditions. while the feedstock sis often cut into 1-22 lengths for composing very small particle sizes will reduce the number of large pores and restrict oxygen distribution. minimizing heat loss, larger piles are suitable for cold weather. However, in a warmer climate, the same piles may overheat and in some extreme cases (75 °C and above) catch fire.
Cool or Hot Composting
Composting is cool or at least the method of composting used by most people is known as Cool or Passive Composting because the heap does not get, or remain, at the high temperatures that can be achieved with the quicker but more labour intensive Hot systems.
Hot or cold
We look at different composting systems and containers later but whether you opt for a pile, heap, wooden, brick or plastic bin you will as with much of life you will need to start at the bottom and work your way up. Hot composting using traditional wooden bins is usually based on regular turning of the material best achieved by moving the composting material between 3 or 4 bins. Aerating, by turning and moisture levels, influence the time taken to create compost. Turning every two days can produce water in about a month, turning weekly can produce compost in a month or two while monthly turning can complete the process in four to six months, If the contents are not turned composting can take between a year and 18 months.
Hot composting can also be achieved using a commercially available insulated bin, such as the Hotbin or a tumble bin e.g. a Jora.
Starting at the Bottom
It is generally accepted that we should try to provide a good airflow to ensure aerobic composting (this may need to be reduced in the winter if the air temperature drops) and this can be achieved by standing the pile or bin on a pallet bas. However, this may restrict access by worms if there is a gap of 6” across the whole of the base so you might consider filling parts of the pallet with earth. Adding sticks to the bottom 6” of a bin placed directly on the soil is also suggested as a way of increasing airflow but remember that this may cause problems if they are too large and you intend to empty the bin using a spade and the hatch provided in many plastic bins as the wood may make removal of the finished compost difficult. If this bothers you use any coarse “browns” such as woodchip, straw, corrugated cardboard (excellent as it traps the air), scrunched up cardboard boxes as an alternative to twigs directly onto the soil. Or be added to them twigs This problem can be overcome if the bin does not have a base by lifting the whole of the bin off the pile of compost to harvest the compost (and if you are keen to aerate it at intervals).
It helps if the material being put in the bin is layered using alternative layers of browns and greens. This is not so important with modern cold composting systems but even if you are just going to chuck waste in as it arises it is good to start with a layer of browns. Once you get going you can make adjustments by eye i.e. if it is too dry add greens if too wet add browns
Next add a layer of Greens. Continue as adding material as waste becomes available it is not necessary to add separate layers of greens and browns (aerating the heap or bin will mix them anyway so if you find adding a mix of greens and browns as they become available do so) but whatever you do you need to keep the ratio of greens and browns right otherwise the material will become wet, black and smelly, of just sit in a dry plie doing nothing other than providing a dry home to rats and mice. You can keep the number of flies and other insects to a minimum by always covering the layer of greens with browns until the bin is full or the compost in the bottom of the bin is ready.
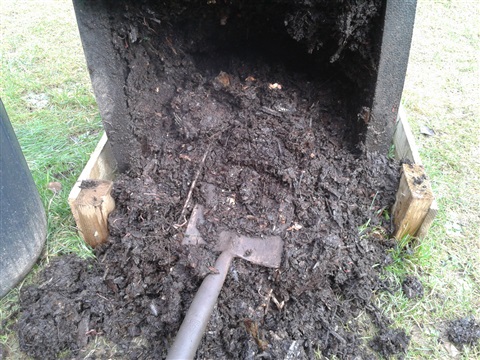
Harvesting
If you are happy to wait a year or 18 months compost will indeed just happen in the bottom of the pile. If you need a quicker turn round because of lack of space, more time to manage the system or a modern bin which provides some form of insulation and aeration you could have compost in a couple of months. Aerating the bin or heap will speed the process and depending on your choice of bin this can be down manually by forking, manually but with less effort using an aerator in a modern bin or by tumbling or rotating the bin.
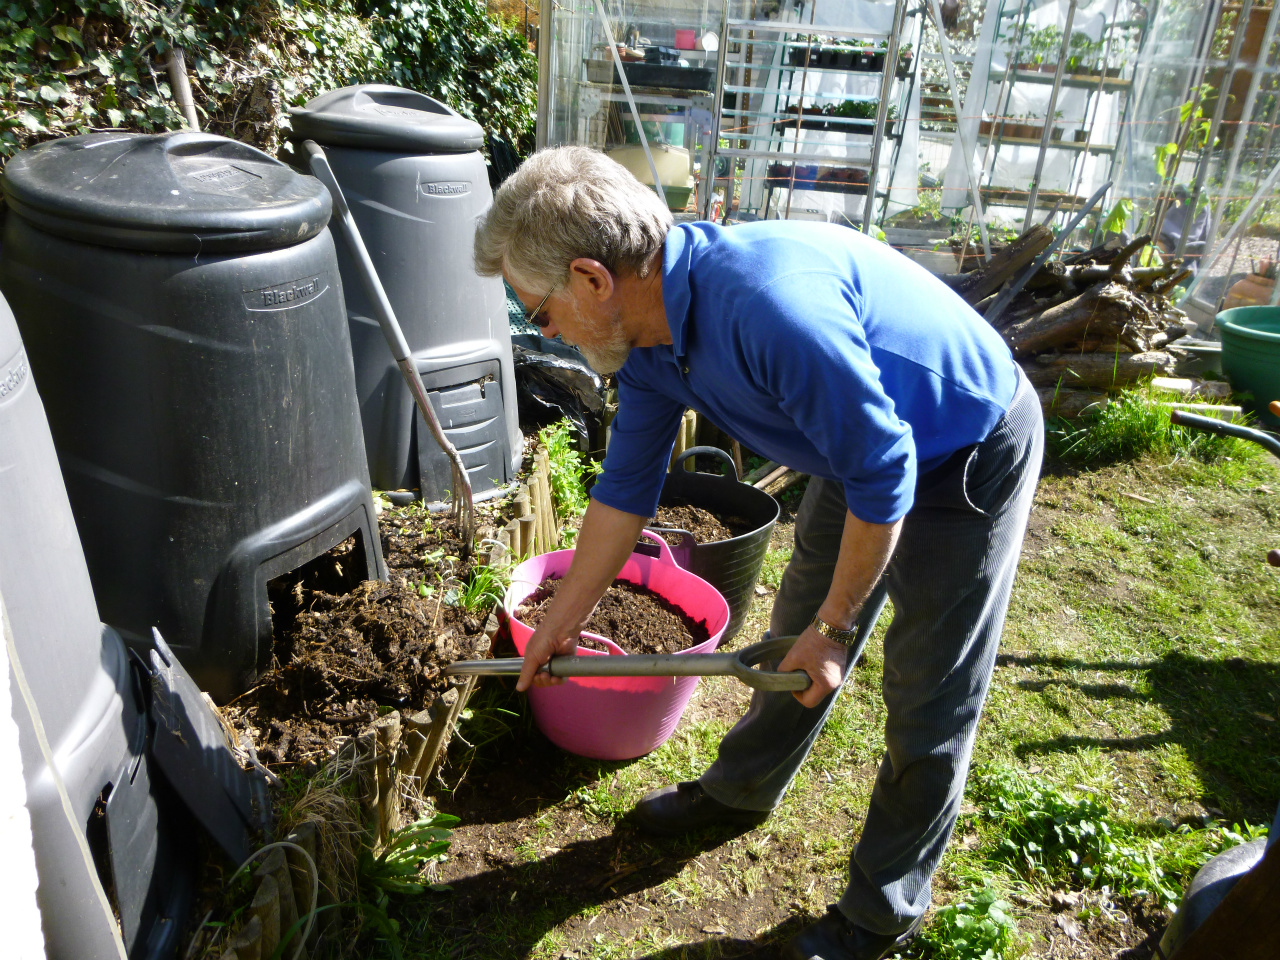
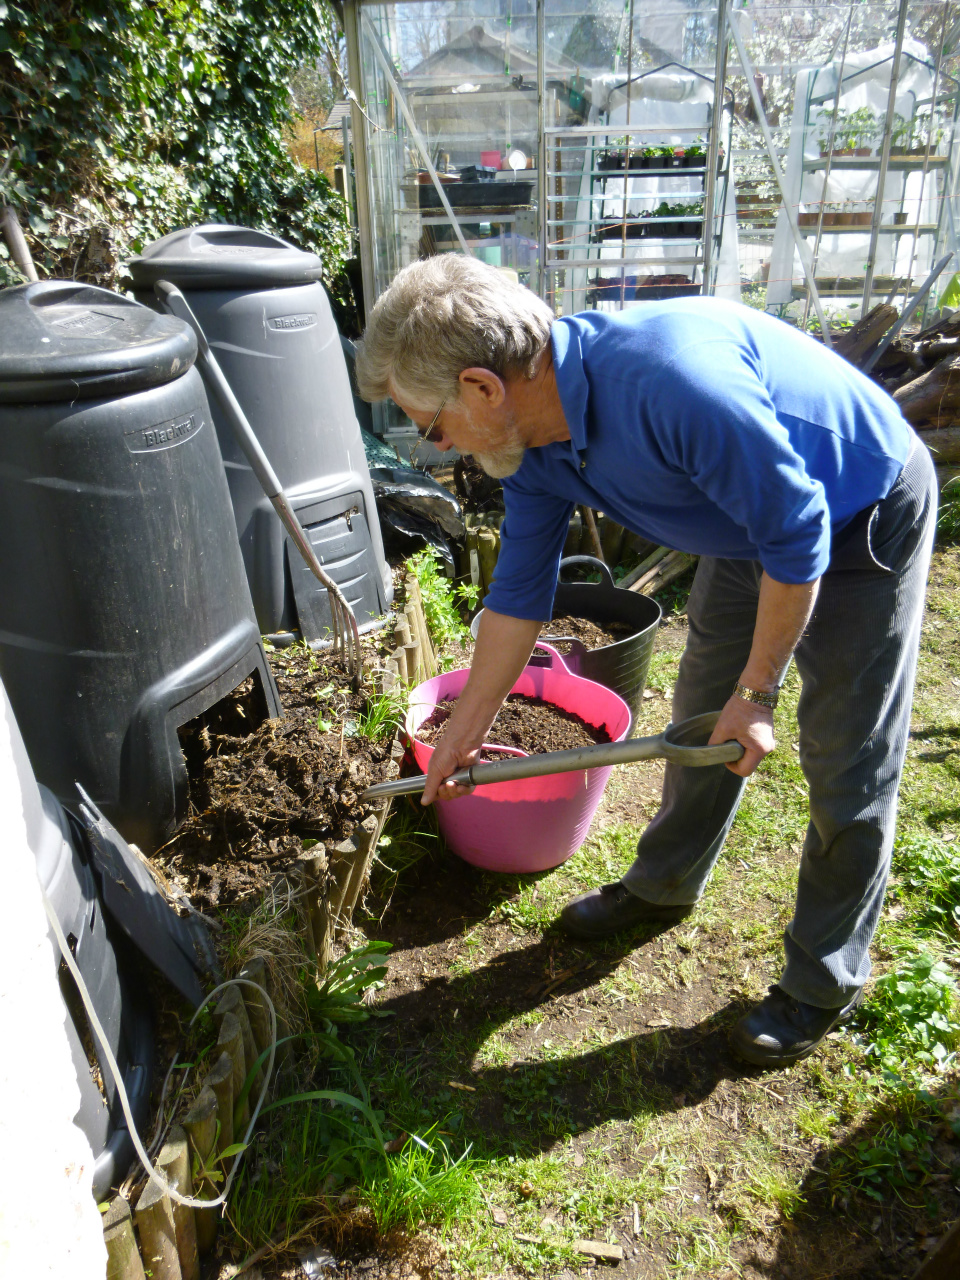
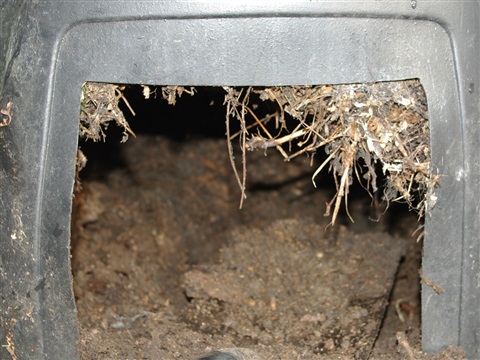
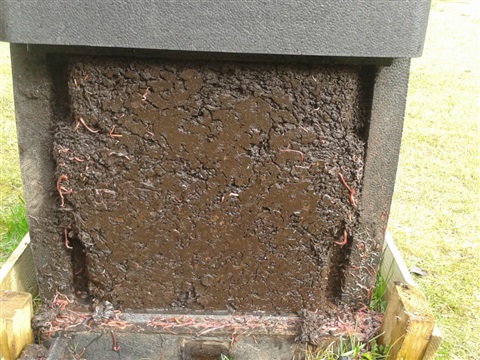
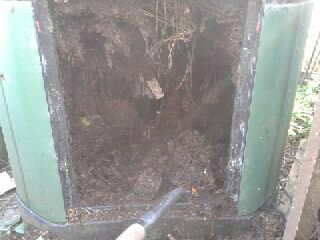
If you have a wooden bin with a removable front of a plastic bin with a large opening at the base e.g. Komp 250 or Hotbin it is easy to inspect and remove the finished compost through the hatch. If you bin only has a small hatch and no base it may be easier to lift the bin off the compost leaving a exposing the compost. The top layers will not have composted and should be returned to the bin if the material at the bottom of the pile has composted use it on the garden.
Ensure that the material returned to the bin is mixed well (aerated) and add water if it was dry Some composters use this process of removing the bin, mixing the compost and returning it to the bin at regular intervals to aerate the contents and speed up the composting process.
The Hot Heap
Many of us older composters may remember steaming compost heaps in the gardens of the "big house" or may have seen them on visits to National Trust properties. We can use Hot systems at home, but they require more work and operate best if a batch of three bins are used. We will look at these systems in detail elsewhere.
To start a hot heap, you will need to collect enough material to fill your compost bin at one go. This will require somewhere to store the material before it is added to the compost bin In order to increase aeration it the tougher items such as stems should be shredded or chopped up using a spade, shears or secateurs.
In most homes greens will be readily available in the form of kitchen waste throughout the year but browns from the garden may need stock piling for future use. Autumn leaves can be collected and stored in a loose pile in dry place, prunings can be shredded as they become available and the woodchip stored in a dry place, woodchip or sawdust may be collected from local sources or from the council on an informal basis. Hay or straw can be collected from a local farm or pet shop. Cardboard and shredded paper may be available from l;ocal offices or shops.
The green and brown ingredients should be mixed, either before or as they are added, and watered. The heap will heat up within a few days and then after a week or two start to cool down. You can measure the temperature with a thermometer of leave a fork in the heap for a couple of hours. If when you remove the fork you can hold the prongs it is time to turn the heap. From which you can conclude that if it burns your hands everything is fine!
Once cooled the contents of the heap are normally turned over into a second bin putting the material that was on the outside trying in the centre. Water is added if the contents are dry, and more browns if it is wet. The aerated bugs in the heap should burst into life and the heap will heat up again. Repeat this turning until there is little or no heating of the pile. Hot Composting can be achieved with a single heap but mixing the content is more difficult. However, turning the heap is the key to quick composting.
We will consider some of the traditional methods of composting before looking at the range of modern bins available.
-
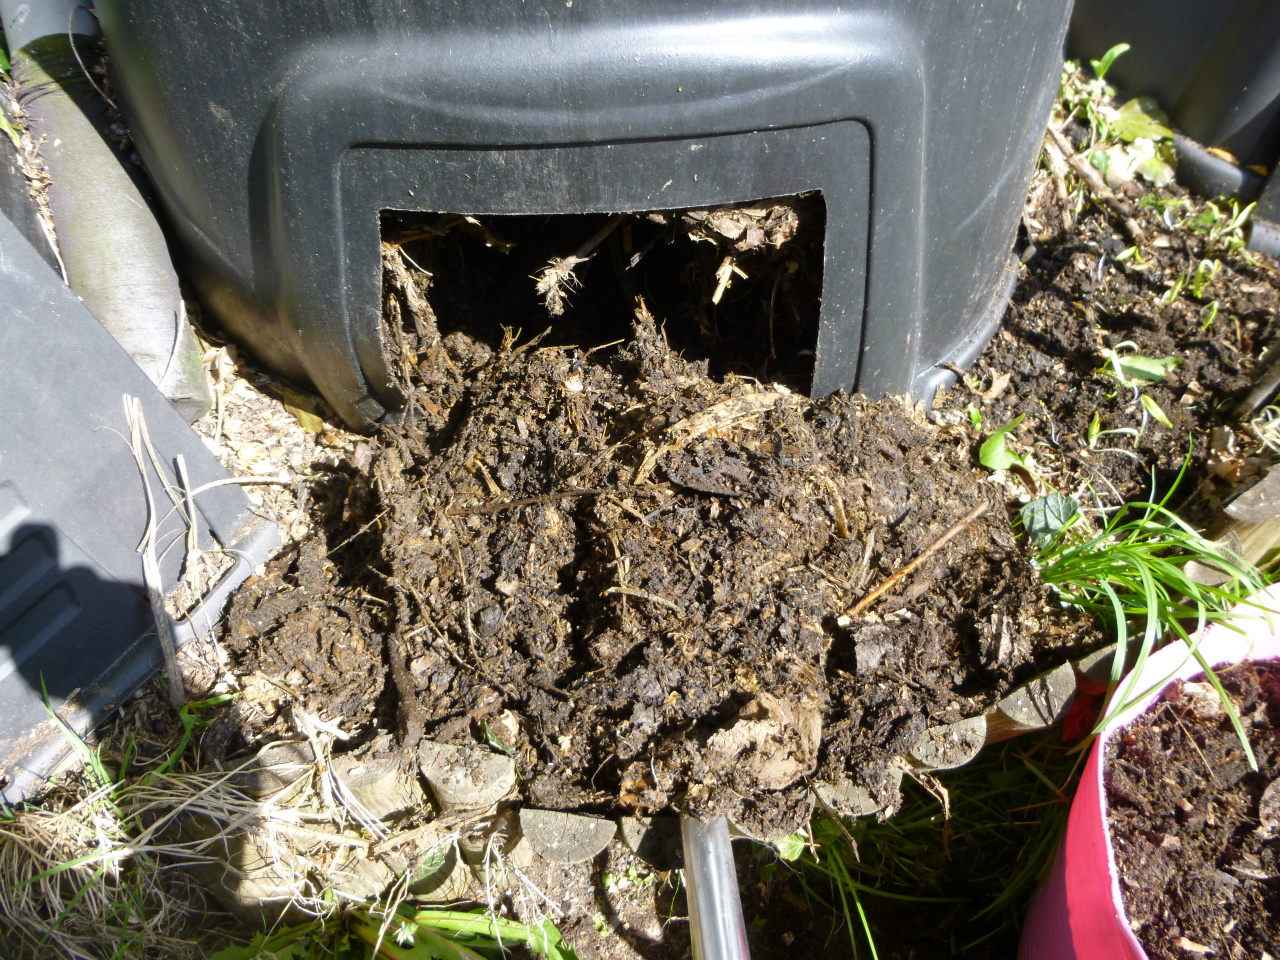
Harvesting compost
Small hatch means that many people will lift the bin off the compost
-
Hotbin ready to harvest
The larger hatch of this Hotbin bin makes harvesting easy
-
Harvesting a Hotbin
Removing compost from the Hotbin
-
Harvesting from an Aerobin 400 This bin has a central areation tube so compost is harvested from both sides.
-
The Aerobin has two hatches. This shows the compost harvested from one of the hatches.
Open Air Composting
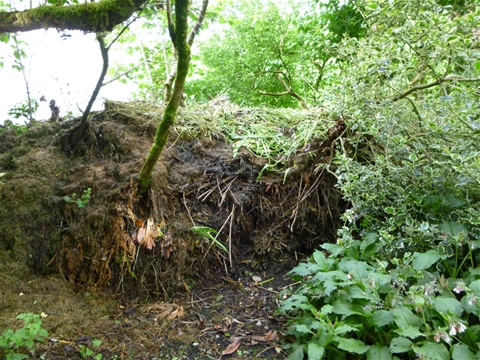
Open Air Composting Otherwise known as a smelly mess
Open air composting is probally the simplest method of composting in that all you do is make small piles of compostable waste in conventient places round the garden. It will take some time to breakdown, considerably longer than in a compost bin and does not look every tidy. Food waste should be avoided as this would attract vermin and smell(?). However manure can be added to provide a nitrogen boost.
Even if you have a large garden with lots of unvisited areas I would not recommend this approach. Ian Walls in Creating Your Garden (Collins 1967) wrote "Very few gardeners make their compost correctly as unfortunately, the term `compost heap` generally means a glorified dump where herbage is stacked on herbage, excluding air and preventing any heating." He continued that disease, pests and diseases present in the original material, survived the so called composting process and would be spread when the rotted material was used. It also looks a mess!.
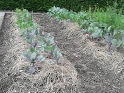
Sheet Composting
Sheet composting is a technique where organic material is spread over an area of the garden and composted in situ. It builds up organic soil content quickly and involves less work than using a heap or bin. It offers the advantage to gardeners with large gardens in that a large area can be composted with minimum effort. Sheet composting provide a cheap way of filling a raised bed rather than using purchased commercial compost A further advantage is that if the soil conditions are right i.e. airy, moist, , warm and has high levels of nutrients it will produce compost fairly quickly provided the organic materials have a the correct carbon, nitrogen ratio. If the C/N ratio has too much carbon the soil will be depleted of nutrients during the initial stages of decay while the surplus carbon has been consumed. This is a common problem when woody material is spread on the garden.
The autumn is a good time to start sheet composting. To prepare the area remove any pernicious or persistent weeds as sheet composting may not smother these weeds. If the area consist of grass mowing or scalping the grass down to the lowest possible level over the area to be composted. It is suggested that the composted area does not exceed a width of 3-4 foot as this will enable the center of the bed to be reached from either side during composting.
It helps to loosen the soil underneath the proposed bed with using a fork to improve drainage. It helps to spread a 2 to 4-inches of organic material over the surface and dig, hoe or rotavate into the soil. Cover with 4-6 overlapping layers of newspaper or cardboard (carbon material that smothers the grass. Wet the newspaper or cardboard thoroughly.
Cover the papers with a one-inch layer of a nitrogen source materials e.g. green garden waste (including fresh green annual weeds having removed any seed heads, kitchen scraps, comfrey or nettle leaves, manure or a mix of any of these.
Cover with another layer of carbon material e.g. cardboard, leaves, shredded paper, straw. Continue to adding alternating layers of nitrogen and carbon materials until a height of between 18 inches to three feet is reached. As the material decomposes additional layers should be added always ending with a carbon layer.
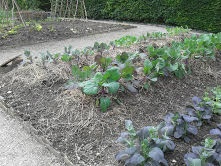
Lasagne Composting
Lasagne composting at Sibston Demonstration site
Lasagne composting is no-dig, no-till method of organic gardening utilising sheet composting. It is so called due to the layered appearance of the composting process which resembles a Lasagne. It does not imply that it is edible.
As described above a layer of wet corrugated cardboard or three layers of newspaper is laid directly on top of the soil, or grass. Alternate layers of “browns” and “greens” are added to a height of about two feet. The brown layers should be twice as deep as the green.
This can also make an excellent way of filling a raised bed.
-
Lasagne Composting
The techniques in use in a garden
-
Lasagne Composting
-
Lasagne Composting
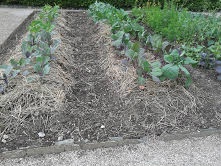
Grass Boarding
Grass Boarding showing layers of grass and cardboard. The heap would normally be covered with more cardboard
Grass boarding is a type of sheet composting that is very useful if you have a large lawn or grassed area such as the paths and car park on an allotment site.
The technique originated at the Centre for AlternativeTechnology, which is well worth a visit. All that is required in addition to the grass mowings is cardboard or paper. Corrugated cardboard is very effective but discarded paper towels from the office can also be used, as can any of the usual paper materials normally added to the compost bin. Dry straw can also be used . Some add a little soil between the layers as well as lime.
The technique can be used on open ground to form a heap, enclosed within a wooden frame to keep it tidy or for smaller quanties undertaken in a dedicated compost bin. All that is reuired is alternate layers of cardboard, or paper, and grass. Spread the grass about an inch or two deep and then place a layer of carboard on the grass. Do not press it down or compress it as you do not want it squashed as this will result in anaerobic fermentation which will result in a smelly mess.
If a compost bin is used the paper should be torn up and crumpled to assist with the aeration of the material but large sheets of cardboard can be used on open heaps
Mulching with Grass Clippings
Mulching is a simple alternative to composting when faced with large quantities of grass cuttings leaves and woody waste it offers a good way of controlling weeds, reducing the need to water and to provide some nutrients to the soil.The mulch initially acts as a weed surpresent and then provides the soil with nutrients and organic material.
The technique is simple the multching materials are spread over the ground. Only thin layers of grass (maximum of about an inch) of clippings at a time.
Grass, Card and Soil Sandwich
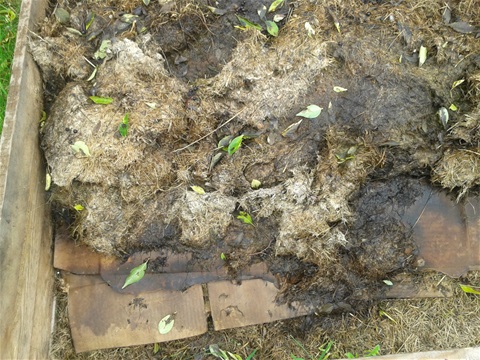
A variation on grass boarding involves the addition of soil to the heap as a means of introducing additional microorganisms to the composting processes. The heap is started in the same way as conventional grass boarding by loosening the soil and applying a layer of cardboard or paper which is covered by a 20cm (8”) layer of fresh grass clippings. A 3cm (1”) layer of soil are added to the grass followed by alternate layers of cardboard/paper, grass and soil until the heap reaches the desired height. The heap may be covered to keep it dry during wet periods but may need watering to provide moisture during dry hot spells. I would suggest starting a new heap each grass cutting seasons as heap prepared during one summer should be ready for use ready for the start of the next.
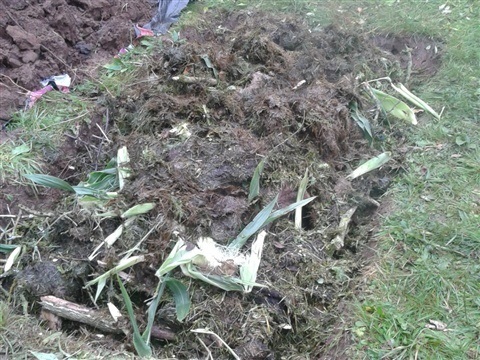
Hugelkuktur Mound
In this Permaculture technique large pieces of rotting wood buried so that it decomposes below ground while allowing the cultivation of plants on the raised mound or less commonly a sunken bed. It may be considered as a combined raised bed and compost heap which is said to remain fertile for up to 6 years.
The system was invented in 1979 by Hans Beba and Herman Andra, although composting and growing in mounds is said to have been used in Eastern Europe for hundreds of years. I have included it here as a means of composting woody material including quite thick logs and tree stumps. This is not intended to replace the insect and hedgehog friendly wood pile in the garden but it does provide an interesting additional composting tool and offers an alternative to bonfires as an environmental friendly means of disposing of logs and other unwanted woody material without the need to split, cut or chip the logs as they can be used whole A communal hügelkultur bed snaking its way across those areas where the ground is currently unsuitable for cultivation could become a of every allotment site
The base material used in the bottom of the trench, or directly on the soil if a trench is not being dug, is wood of varying sizes. This can include rotting logs, sticks, branches, and twigs. The bed can also be built round tree stumps and provides a means of composting them.
As the technique normally involves building a raised bed rather than a traditional compost heap the site of the mound does not need to be hidden at the bottom of the garden but can be in view. This makes it easier to choose a spot where plants can be growing on the mound once it is established.
The simplest bed suitable for a smaller garden can consist of small mounds about 60cm high of rotting wood or sticks placed on the ground directly on forked over ground layered closely together. Grass clippings and other nitrogen rich greens such as manure are added filling any gaps between the logs. The mound is then covered by 5cm of topsoil.
Larger "mounds" usually starts with a trench with a raised mound structure being built by the addition of the layers of compostable material. As with a normal trench composting the system it is best started in the autumn so that the heap will be ready for sowing for new growing season in the spring.
With larger mounds a trench is desirable, as it helps keep the mound tidy and retains moisture, but it is not essential; the mound can be built straight on top of the soil or even on concrete. Where the mound is to be built directly on the soil a number of sources suggest mowing or strimming any grass and then covering the ground with damp cardboard.
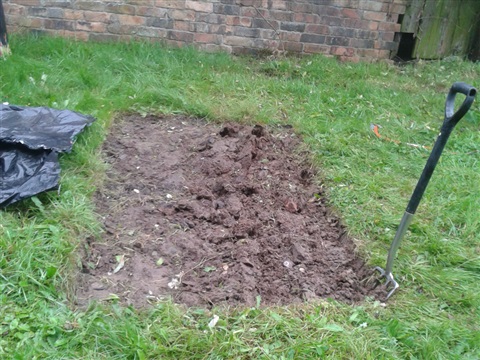
If the mound is to be built in trench on a grassed area the grass should be removed carefully as turves, which are set aside for use during the next stage of construction.
The soil dug from the trench is kept for use as the top layer of the completed mound. If the mound is being made in a previously dug part of the garden it will be necessary to obtain turves from elsewhere or to miss the turf layer.
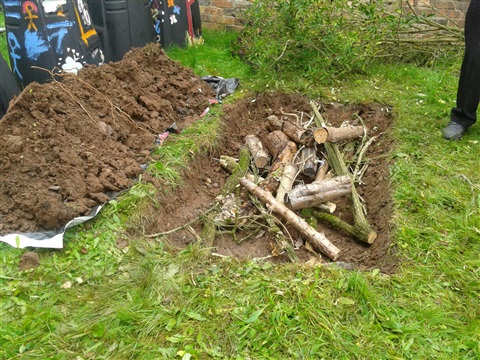
The trench is dug, normally in a north south direction about 1.5 meters wide and 12" deep. It can be as long the compostable material available permits. The mound will shrink so build it higher than the final height that you would like the bed to be.
Once the trench is dug a border of logs, boards or stones may be built round it to frame the bed and keep it tidy, alternatively a more natural mound may be built without a frame.
Logs, branches, and other woody matter which decomposes slowly are placed in the bottom of the trench. The larger items are used first with the smaller branches, twigs, leaves, wood chip and other compostable materials added over the top of the woody layer and to fill the gaps between the larger pieces of wood. The addition of nitrogen rich urine is said to be beneficial If the mound is being built in the New Year the discarded Christmas tree can be included in this layer. It helps if the larger stumps and logs are already rotting.
Because of the inclusion of the wood the mound will initially be low in nitrogen, so it is important to include nitrogen rich materials such as manure, kitchen waste or grass to help fill the gaps between logs and in subsequent layers. The material should be watered well.
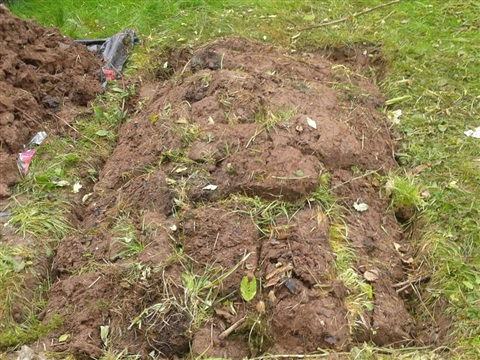
If turves have been saved, they should be placed upside down (with the soil/roots up) over the woody material forming a domed cover. Water the turves and each subsequent layer as it is added.
The turves are in turn covered with a about an 8”- 12" thick layer of garden waste, leaves and the usual compostable materials. As with the woody layer use the larger items first. This in turn is covered by a 4 - 6” layer of semi-mature compost or manure. These layers can be repeated until the desired height is reached (remember the mound may shrink by a half during the first year).
The soil removed when digging the trench is then used as a final layer to cover the pile. If the mound is built correctly the heat released by the decomposition will warm the soil helping to extend the growing season
The technique
can of course be varied to suit the situation. A mound can be made by digging a trench, as above, about a foot deep putting hardwoods in the bottom followed by soft woods, with the wooden portion being covered with twigs and small prunings. Manure,
straw, and the usual uncooked kitchen and garden waste is then added. Depending on the proposed use of the area the soil and the turf removed when digging the hole is then added.
As the wood decomposes the mound will shrink during the first year or two and if it is wished to maintain the initial height greens covered by a layer of compost can be added.
If a site is unsuitable for a mound the technique can be used so that the ground remains level or slightly sunken A trench or ditch can be used, dug so that the logs can be buried as deeply as possible, Greens etc can be added as if building a mound but stopping at ground level.
-
Removing turf to start the mound
-
Soil dug out and logs and woody material added.
-
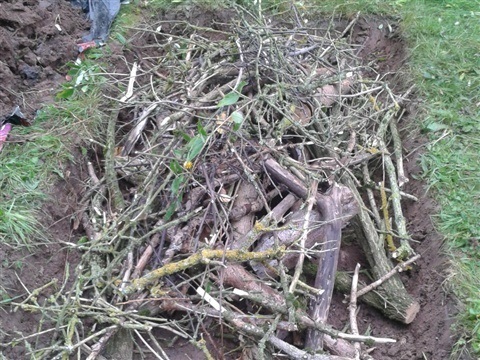
Smaller woody items added
-
Greens added to woody material
-
Turf used to cover woody and first "greens" layer
-
Mound built up using layers of greens and browns. More photos to follow as we build the mound.
Sandeep
Your content is very valuable. Thank you from https://smartenvirosystems.com/ for giving important information.
Mrs J Snelling
Hi, in your ‘compost area and choice of method,’ why do you not also suggest putting cooked food into a bokashi bin first then after fermenting for approx two weeks feed it to the wormery. ?
Rodney Weston
Because it is anaerobic fermentation rather than aerobic composting. Bokashi has its own page. The page has recently been enlarged
Direct Compost
Great article with informative content.